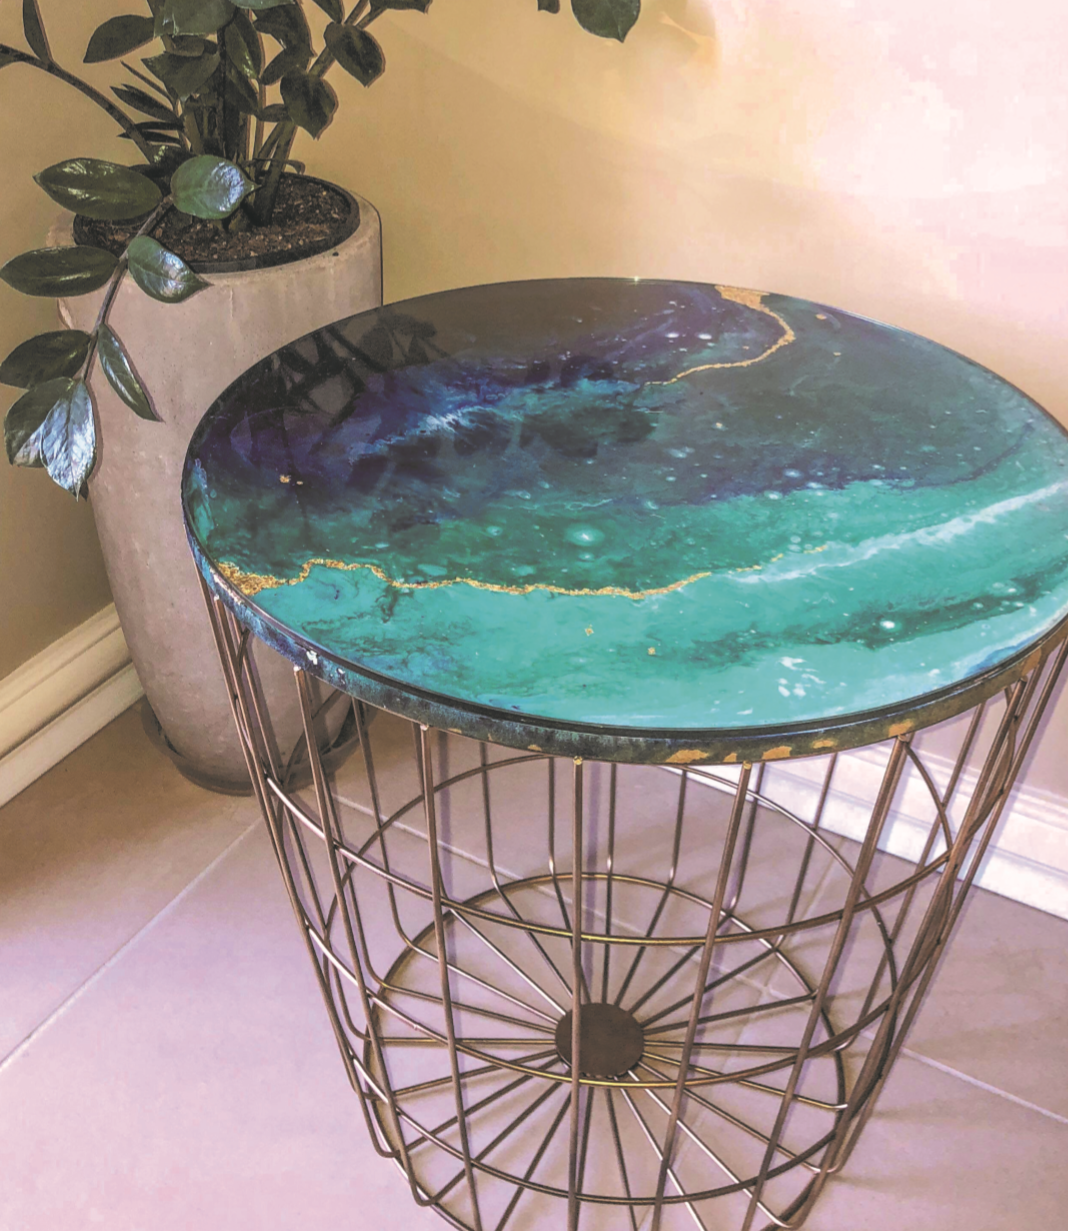
Colorful Chaos The Fluid Art – Dirty Pour Technique

Colorful Chaos
The Fluid Art - Dirty Pour Technique
By DeDee Birdsall
Do you have a tired, worn out coffee or end table that could use a fresh coat of paint and a little TLC? Most of us do. Bring life back into that piece of furniture while getting in touch with your artistic side using a technique called the “Dirty Pour”. A unique fluid art form, the dirty pour is as simple as an at-home science experiment. Here we’ll show you the down and dirty secrets for creating the perfect modern piece from your existing home collection or a roadside find. With little effort, you’ll be on your way to becoming the next Jackson Pollock.
Beauty is in the Eye of the Beholder
So, what’s a dirty pour, you ask? It’s merely a term used for combining multiple acrylic paint colors and a few additives in the same container, then pouring it onto your desired surface and moving it around to distribute the paint. Because of the addition of oil, cells of irregular patterns form, creating a kind of 3D effect. Heat can be applied using a butane torch for added interest, but even without heat the results are beautiful. This versatile technique can be used to create abstract paintings on canvas, tables, coasters, dressers, buffet tops, clocks and more.
50% Fact, 50% Magic – 100% Results
If you’re a newbie to fluid art painting, we’ve taken the guesswork out of the recipe. You’ll need paint, a pouring medium, a thinning agent and silicone; the trick is to achieve the perfect “pouring” consistency without losing the integrity of the paint. Here’s the breakdown, with a recipe that follows.
- Acrylic Paint: Stop by your local craft store and pick acrylic craft paint in a variety of colors.
- Pouring Medium: We’ve found many different recipes using all kinds of household items for the pouring medium, including dish soap, glue, etc.; however, after many dirty pours, we found Liquitex Professional Pouring Medium to be the best.
- Silicone: Rather than looking for the perfect silicone, we used a less expensive and readily available hair oil that works great, Nourishing Coconut Milk Anti Breakage Serum.
- Floetrol: This latex paint thinner creates the unique cells in the end result, and can be found at big box hardware stores.
Nothing Better Than Watching Paint Dry
Dirty pouring is a messy project, so it’s best to have a clean work area before you get started. We suggest using plastic tarps on the floor. A kiddie pool works great for table projects where runoff may be a little more than your average pour on a canvas. Since you’ll be adding oil and pouring mediums, the drying times can be upwards of 24 hours, so create your pour in a space that won’t be disturbed by pets or children. To ensure a successful project, we recommend you start small and find some color and style inspiration before you dive right in; a quick YouTube search will bring back some excellent examples.
A Picture Paints a Thousand Words
To help you better understand the dirty pour as well as the complete fluid art process, here are the most notable pouring techniques
- Dirty Pour: Individual colors are prepared according to the recipe and poured one after the other into a single container before pouring or drizzling. You can carefully mix these with a stir stick before pouring or leave the colors separate.
- Flip Cup: Individual colors are prepared according to the recipe and poured one after the other into a large container (and are not stirred) before pouring the entire cup onto the canvas or furniture piece.
- Puddle Pour: Individual colors are prepared according to the recipe and poured onto the canvas in pools. Additional colors are poured and pooled on top of the original color.
- Swipe: A technique that can be used in conjunction with other pouring methods noted above, the swipe takes place after the pouring. You can use just about anything with a straight edge to swipe, including a paint chipper, small plastic ruler, spatula, etc. Swiping the layers helps move the paint and create cells that vary in size and shape.
What You’ll Need
- A kitchen scale that measures in grams.
- Liquitex Pouring Medium
- Floetrol
- Nourishing Cocomilk Hair Serum
- Water
- Acrylic craft paints
- Plastic cups
- Popsicle sticks
- Rubber gloves
- Table/workspace covering
Recipe for Success
Follow this recipe for the perfect pour every time.
40 grams Floetrol
20 grams Liquitex pouring medium
10 grams water
20 grams acrylic paint
2 drops hair serum
Combine Floetrol, pouring medium and water in a container and gently mix with a popsicle stick. Place back on the scale and add 20 grams acrylic craft; gently stir to mix the color into the medium. Add 2 drops of hair serum and gently mix.
Note: This recipe adequately covers a 10-inch by 16-inch area. Depending on your project size, you may need to mix additional cups.
Finishing your Project
Drying times will vary depending on the additives you use, but once dry, you’ll want to add a bright finish to give it that “just poured” look and to preserve your artwork. If you are protecting your tabletop, consider coating it with resin, found at hardware and craft stores. If resin is too expensive, varnish is a less expensive option. For finishing wall paintings, Liquitex offers some perfect mediums to do the trick, but resin can also be used. There really is no limit to your creativity. Happy Pouring!
Tip: Before sealing your project, clean your painting with isopropyl alcohol to remove the silicone.
“We don’t make mistakes, just happy little accidents.” — Bob Ross


